
Still playing with the tone mapped hdr's :) It's neat all the different styles you can get out of one image. Just adjust a few sliders and away you go!
Pictures!!
Clicky here - a few pictures of Jr. sleeping on the bed and "Peanut" playing with a Pepsi bottle
Can't wait to try this out on some scenery!
FLIP!
edit: for some reason while blogging my pictures the links are breaking when they are uploaded, sorry for the inconvenience.
Showing posts with label HDR. Show all posts
Showing posts with label HDR. Show all posts
Monday, March 10, 2008
Sleepy cat...


Thursday, March 6, 2008
Just a little more...
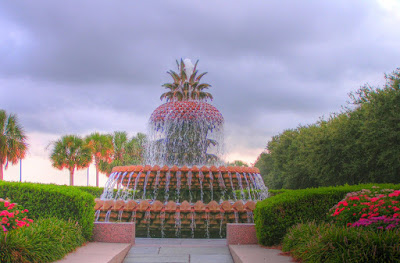
I thought to myself after doing the last HDR tone mapped image... hmmm... I wonder if I have anything in my collection that would pop or benefit from some adjusting.
Then I remebered this fountain in Charleston, SC. Oh yeah, I think it makes a statement.
You can see my source files HERE. As before, I just did some adjustments in PS to make 3 seperate images. Now I need to do this for real... set my camera up and let'r rip!
FLIP!
Wednesday, March 5, 2008
HDR
 Wow, lot's of updates today!
I've recently joined a flickr group based on a podcast that I've been listening to lately, TWIP (This Week In Photography). In this group there has been a discussion about HDR photos, which stands for High Dynamic Range. Basically what you do is take 3+ pictures preferrably on a tripod, with these pictures you adjust the exposure +-2 for each shot. So if you take 3 pictures then your first one will be -2 ev, 2nd is 0 ev, and last one is +2 ev. The more pictures you take the more you would adjust your exposure either way, up or down. Then you take said pictures and load'em up in a program that can handle HDR. Photoshop, Photomatix Pro, or another one called Bracketeer. I used Photomatix Pro to create the picture to the left (above). What it does is combines the pictures... stitches if need be and then gives you options to do Tone Map adjustments. With Tone Mapping you can do subtle things to the image or you can take it to the extreme. With my image, I probably am 50/50. As you can see HERE I took my original picture and ran it through photoshop to adjust the exposure twice and created 2 more pics that are the same but have adjustments to them. Then you let Photomatix do the work, voila! Pretty spiffy. Now you will get a better picture if you use different pictures actually shot from your camera. I just wanted to test it out so I used one picture and made multiples of it.
Neat, neat stuff! Flip!
ps. putting my links in to products and it seems that Bracketeer is Mac OSX only, fyi.

Subscribe to:
Posts (Atom)

